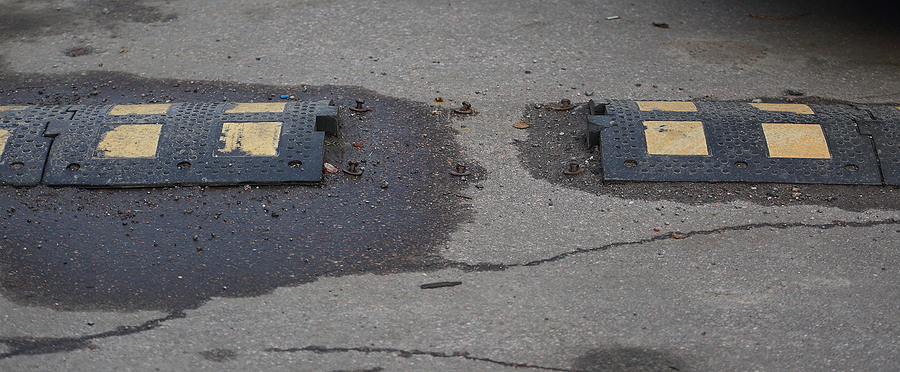
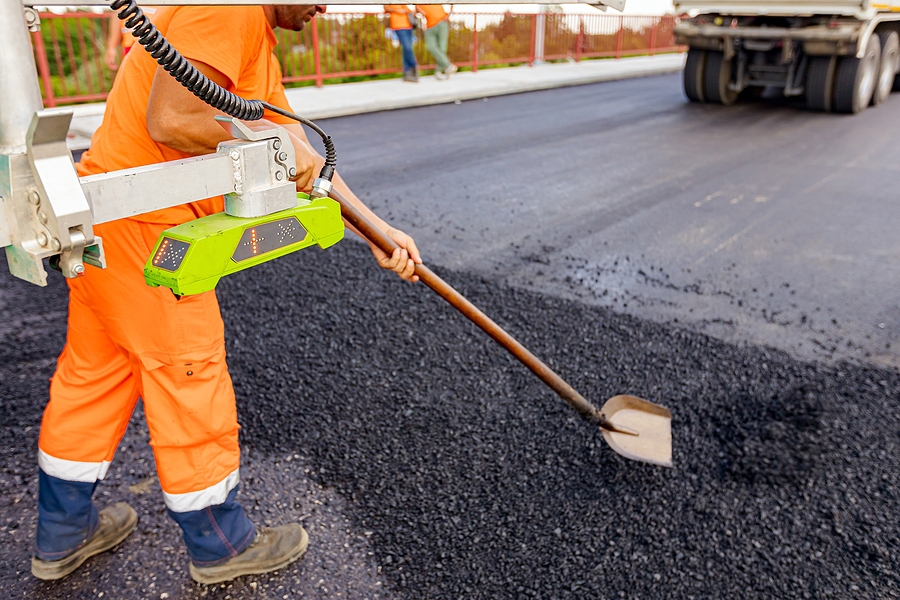
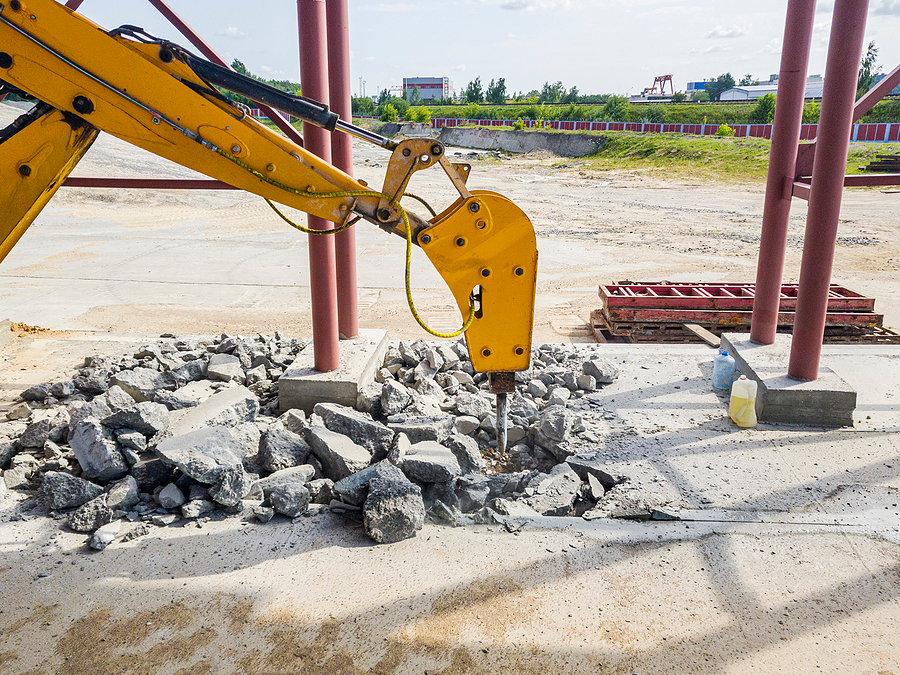
Can You Grind Down Uneven Concrete Instead of Replacing It?

Uneven concrete doesn’t always mean the entire slab needs to be torn out and replaced. If one section of a sidewalk, driveway, patio, or concrete floor sits slightly higher than the surrounding surface, concrete grinding may be able to correct the problem without a full replacement.

Concrete grinding removes a small amount of material from the raised area to create a smoother transition between adjoining sections. For the right type of problem, it can be a practical way to eliminate trip hazards, improve the surface, and extend the useful life of otherwise sound concrete.

But grinding has its limits. The condition of the concrete and the reason it became uneven matter just as much as the height difference.
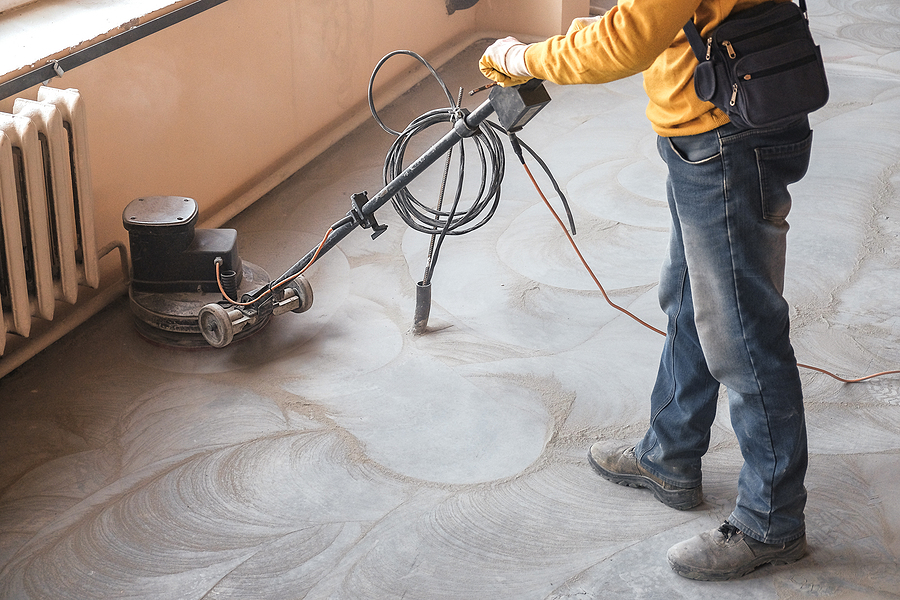
Concrete Grinding and Replacement in Indianapolis

What Causes Concrete to Become Uneven?

Concrete slabs can move over time, especially in a climate like Central Indiana’s.

Common causes include:

  • Soil settling or erosion beneath the slab
  • Freeze-thaw cycles that cause concrete to heave or shift
  • Tree roots pushing sections upward
  • Poor grading or inadequate soil preparation
  • Drainage problems that wash away supporting soil
  • Differences in movement between adjoining slabs

Sometimes the movement stops and leaves behind a raised edge. In other cases, the underlying problem continues, which means simply grinding the surface may only provide a temporary correction.

Can Uneven Concrete Be Ground Down?

Yes, you can. Concrete grinding works particularly well when one portion of the concrete is higher than the adjoining surface and the slab itself is still in good condition.

Specialized grinding equipment with diamond tooling removes concrete from the raised section a little at a time. The goal is to reduce the abrupt edge and create a smoother transition.

This is commonly used for uneven:

  • Sidewalk joints
  • Concrete floors
  • Driveway sections
  • Patios and walkways
  • Slab transitions
  • Other localized trip hazards

One important distinction is that grinding removes high concrete; it does not raise low concrete.

If a slab has sunk significantly, other options such as concrete leveling, slab lifting, or replacement may make more sense. Grinding may sometimes be used on the adjoining high edge, but it cannot restore a sunken slab to its original elevation.

When Is Concrete Grinding a Good Option?

Grinding is generally worth considering when the unevenness is localized and the surrounding concrete remains solid.

For example, a sidewalk panel may have shifted slightly, leaving a raised edge where two sections meet. If the slabs are stable and there isn’t significant cracking or deterioration, grinding may be enough to remove the trip hazard without replacing the entire section.

It can also be useful when concrete needs to be smoothed before resurfacing, coating, or other surface work.

The condition of the slab is more important than following a single measurement or rule. A concrete grinding service should look at how much material would need to be removed and whether doing so would leave the slab in good condition.

When Is Replacement the Better Choice?

Grinding cannot solve every concrete problem. Replacement may be more appropriate when the slab is badly cracked, crumbling, severely displaced, or continuing to move. Concrete that has lost its structural integrity generally needs more than a surface correction.

The underlying cause also matters. If erosion, drainage problems, unstable soil, or tree roots are continuing to move the concrete, those issues may need to be addressed before making a long-term repair. That is why it is important to determine why the concrete is uneven rather than simply grinding every raised area.

Concrete Grinding vs. Concrete Replacement

For relatively minor surface problems, grinding has several advantages over removing and replacing concrete. There is no need to demolish an otherwise usable slab, haul away large amounts of broken concrete, pour a new section, and wait for the replacement concrete to cure.

Grinding can also usually be completed with much less disruption to the surrounding property. Concrete replacement, however, gives you an entirely new slab and may provide the better long-term solution when the existing concrete is extensively damaged.

The right choice depends on the condition of the concrete, the amount of movement, and what caused the problem in the first place.

What Happens During Concrete Grinding?

The process typically starts with an inspection of the uneven area. The contractor looks at the condition of the slab, the elevation difference, nearby cracks, and signs that the concrete may still be moving.

If grinding is appropriate, diamond grinding equipment is used to gradually remove material from the raised section. Several passes may be needed to create a smoother transition. Professional equipment can also be connected to dust-collection systems to help control concrete dust while the work is being performed.

Unlike newly poured concrete, a ground surface does not require a traditional curing period. In many situations, the area can be put back into service shortly after the work is completed.

Are There Any Downsides to Grinding Concrete?

The biggest limitation is that grinding only changes the surface. It doesn’t stabilize soil, correct drainage, lift a sunken slab, or repair severely deteriorated concrete. If movement continues underneath the slab, the uneven area can eventually return.

Grinding can also change the appearance of the concrete. Removing the finished surface may expose some of the aggregate underneath, leaving the repaired section with a different texture or color.

For many sidewalks, commercial areas, and other surfaces where correcting a trip hazard is the priority, that cosmetic difference may be acceptable. For decorative or highly visible concrete, appearance may play a larger role in deciding how to make the repair.

How Much Does Concrete Grinding Cost?

The cost of concrete grinding depends heavily on the project. The size of the area, amount of material that needs to be removed, accessibility, concrete hardness, equipment requirements, and overall condition of the surface can all affect pricing. Small grinding projects may also be subject to minimum service charges rather than being priced strictly by the square foot.

Because of those variables, getting an estimate based on the actual condition of the concrete is more useful than relying on a generic online price range. For localized unevenness, grinding can often be considerably less involved than demolishing and replacing an otherwise usable slab.

Frequently Asked Questions

How long does concrete grinding last?

If the concrete has finished moving and the underlying soil is stable, the correction can last for years. If settlement, erosion, roots, or another underlying problem continues, the slabs may eventually become uneven again.

Does grinding weaken concrete?

Grinding removes material from the surface, so the amount that can safely be removed depends on the slab and the severity of the unevenness. This is one reason larger elevation differences need to be evaluated before deciding to grind them.

Can you grind a sunken concrete slab?

Grinding cannot raise a sunken slab. It may be possible to grind an adjoining raised edge to improve the transition, but significant settlement may require concrete leveling, lifting, or replacement instead.

Will the repaired area look different?

It can. Grinding may expose aggregate below the finished surface, resulting in a slightly different color or texture from the surrounding concrete.

How do I know whether to grind or replace my concrete?

Look at more than the uneven edge itself. Severe cracking, deterioration, continued settlement, or substantial movement may make replacement or another repair method more appropriate. An on-site inspection can determine which option makes the most sense.

Find Out If Your Uneven Concrete Can Be Ground Down

Uneven concrete doesn’t automatically need to be replaced. When the slab is still in good condition and the problem involves a raised or uneven section, concrete grinding may provide a simpler way to correct the surface.

ACI Asphalt & Concrete provides concrete grinding services throughout Indianapolis and Central Indiana. We can evaluate the condition of your concrete and determine whether grinding, resurfacing, repair, or replacement is the better approach for the property.

Get a free concrete grinding estimate or call 317-549-1833 to discuss your project.

Related Posts:

An Essential Guide to Asphalt and Concrete Surface Preparation in Indiana
Expert Concrete Repair for Commercial Properties: Durable and Cost-Effective Solutions
Commercial Concrete Repair: Preserving and Protecting Your Investment
Parking Lot Traffic Flow: 6 Design Measures That Actually Work

A parking lot is often the first and last impression a customer has of your business. A confusing, congested lot creates frustration before a customer even walks through your door—and that frustration can follow them into their shopping experience. Poor traffic flow doesn’t just annoy drivers; it increases the risk of collisions, slows down pedestrian access, and can even hurt repeat business.

The good news is that most parking lot congestion problems come down to a handful of fixable design issues. With the right layout, signage, and maintenance plan, your parking lot can move traffic smoothly, protect pedestrians, and make a strong first impression on every visitor.

Here’s what property owners and facility managers in Indianapolis should know about designing a parking lot that keeps traffic flowing safely and efficiently.

Parking Lot Traffic Flow

How Does Parking Lot Layout Affect Traffic Flow?

The layout of your lot determines almost everything about how traffic moves through it. Getting the angle, spacing, and markings right from the start prevents most bottlenecks before they happen.

Angled vs. Perpendicular Parking: Which Is Better?

Choosing between angled and perpendicular (90-degree) parking spaces has a direct impact on how cars move through your lot.

Perpendicular (90°) parking fits the most vehicles into a given space and works well with two-way traffic lanes. It’s the standard layout for retail centers, office buildings, and churches, where maximizing capacity matters most.

60° angled parking is easier for drivers to pull into and typically pairs with one-way traffic lanes, which naturally reduces head-on conflicts. This layout suits convenience stores, quick-service restaurants, and medical offices, where quick turnover matters more than squeezing in every possible space.

45° angled parking requires the narrowest drive aisles of the three, making it a smart choice for tight lots or properties converted from other uses. According to David Percy, a mathematics professor at the University of Salford, 45-degree parking layouts can improve space efficiency by as much as 23% compared to straight parking, since cars need to change their angle far less to park.

If your lot struggles with slow-moving traffic during busy hours, switching from perpendicular to angled parking (or vice versa, depending on your space constraints) may solve more problems than you’d expect.

Spacing and Signage That Keep Traffic Moving

Once you’ve settled on a layout, spacing and signage do the heavy lifting for keeping vehicles moving predictably:

  • Two-way aisles need at least 24 feet of width to let vehicles pass safely.
  • One-way aisles can run narrower, typically 10 to 12 feet, depending on local code.
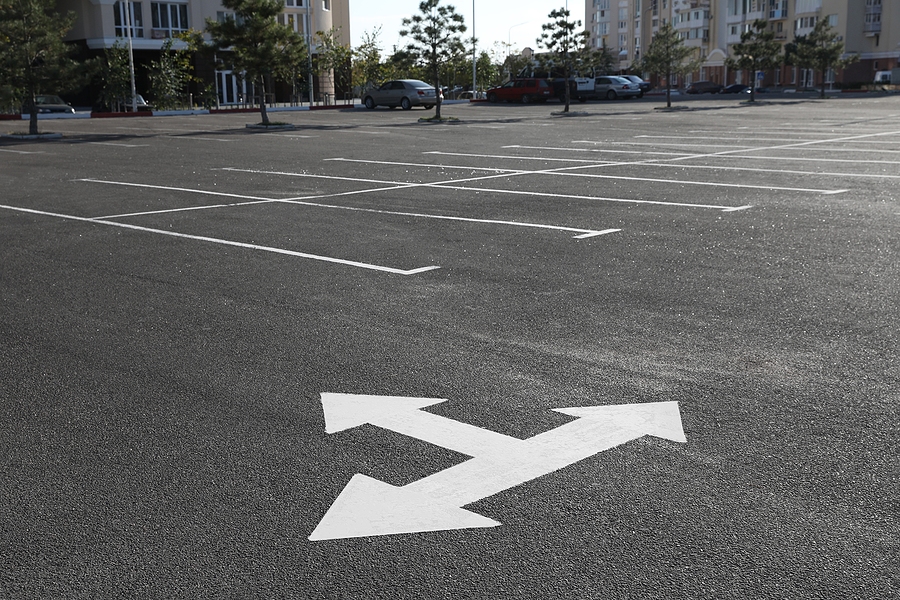
  • Directional arrows at every aisle entrance tell drivers exactly where to go.
  • STOP bars at internal intersections prevent T-bone collisions between crossing vehicles.
  • “DO NOT ENTER” markings at exit-only points stop drivers from entering against traffic.

What Traffic Control Measures Reduce Parking Lot Congestion?

Layout sets the foundation, but active traffic control measures keep vehicles from clashing once the lot fills up.

One-Way vs. Two-Way Traffic Patterns

One-way traffic lanes take up less space and pair naturally with angled parking, but they depend heavily on clear signage to avoid driver confusion. Two-way lanes offer more flexibility, since drivers can enter or exit from either direction, but they require wider aisles and more careful management to prevent congestion during peak hours. The right choice depends on your lot’s size, shape, and typical customer volume.

Speed Bump Placement Strategy

Speed bumps are one of the simplest ways to slow traffic in high-risk zones, but placement matters. They work best near pedestrian crossings, entrances, and busy drive aisles—not scattered randomly throughout the lot, which can create unnecessary wear on vehicles and frustrate drivers.

Entrance and Exit Design Best Practices

Separate, clearly marked entrances and exits prevent bottlenecks at the busiest points in any lot. Where possible, adding multiple entry and exit points spreads out traffic and reduces wait times, especially for larger lots or high-traffic retail locations.

How Do You Manage Parking Lot Capacity During Busy Hours?

Even a well-designed lot can feel chaotic if it’s not sized correctly for demand. Calculating the right number of spaces—and planning for peak hours—prevents the kind of gridlock that sends customers elsewhere.

Start by reviewing your busiest hours and typical customer turnover rate. Retail centers, restaurants, and medical offices all have different peak patterns, and your lot should be designed around your specific traffic. For businesses that regularly hit capacity, consider overflow solutions like designated overflow parking areas, valet service during peak times, or dynamic pricing models that encourage turnover in high-demand periods.

What Safety Measures Should Every Parking Lot Include?

Traffic flow and safety go hand in hand. According to a 2017 Institute of Transportation Engineers (ITE) report, vehicle-pedestrian crashes in parking facilities are a significant concern, with retail properties like shopping centers and grocery stores accounting for the majority of incidents. Most of these crashes happen in parking aisles, and midday hours (12 p.m. to 4 p.m.) see the highest crash rates.

Lighting and Visibility

Adequate lighting is one of the most effective ways to reduce accidents and improve visibility after dark. General parking areas should maintain 1.0 to 2.0 footcandles, while entry and exit points benefit from brighter lighting in the 2.0 to 5.0 footcandle range to support quick decision-making. Pedestrian walkways and crosswalks should stay within 1.0 to 3.0 footcandles, with an emphasis on reducing glare and shadows.

Pedestrian Pathways and Crosswalks

Separating pedestrian and vehicle circulation is one of the most important steps a property owner can take to prevent accidents. Well-marked crosswalks, clear wayfinding signage, and raised islands at the ends of parking rows all improve sightlines and give pedestrians safer paths to building entrances.

ADA Compliance and Accessible Spaces

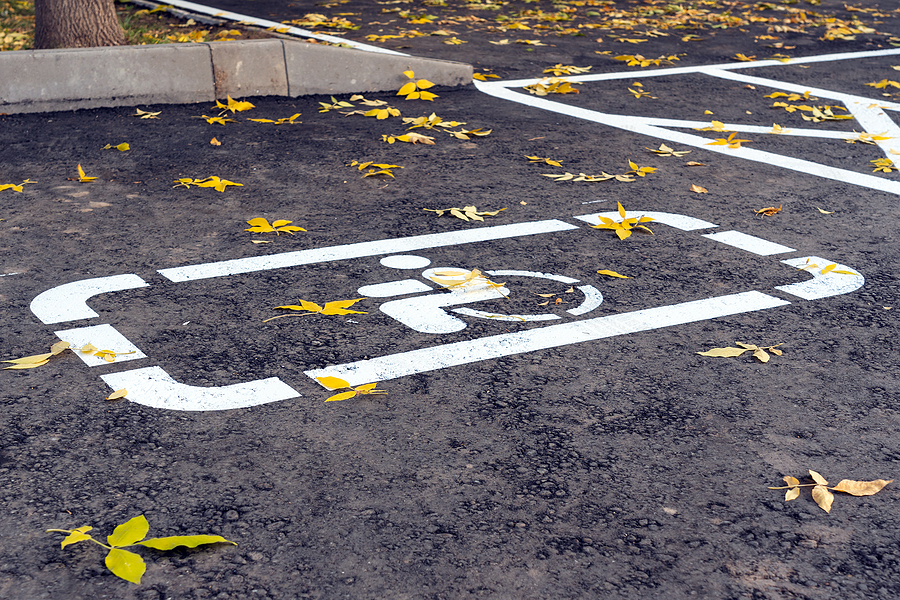
Federal ADA requirements specify minimum numbers of accessible parking spaces based on total lot capacity. For example, a lot with 301 to 400 total spaces needs at least 8 accessible spaces, while lots with 501 to 1,000 spaces must dedicate 2% of total spaces to accessibility. Accessible spaces require an adjacent access aisle, and at least 1 in 6 accessible spaces must be van-accessible. Every accessible space also needs a clear, unobstructed route to the building entrance.

How Often Should You Maintain a Parking Lot for Safety?

A well-designed parking lot won’t stay effective without consistent upkeep. Regular inspections catch cracks, potholes, and fading line markings before they become safety hazards or costly repairs. Most commercial lots benefit from a full parking lot inspection at least twice a year, with additional checks after harsh Indiana winters.

Repainting stall lines, directional arrows, and crosswalks on a regular schedule keeps traffic control measures visible and effective. It’s also worth reviewing your traffic patterns periodically based on actual usage data—if certain aisles consistently bottleneck or accidents cluster in a specific area, it may be time to adjust your layout.

Frequently Asked Questions

How much does it cost to redesign a parking lot for better traffic flow?

Costs vary widely based on lot size, current condition, and the extent of changes needed. Simple updates like re-striping or adding signage cost far less than a full layout redesign or repaving project. A professional assessment is the best way to get an accurate estimate for your property.

What’s the best parking layout for a small business lot?

Angled parking, particularly 45 or 60 degrees, tends to work well for small lots since it requires narrower aisles and simplifies parking for customers who may only stay a short time.

How many accessible parking spaces does my lot need?

The number depends on your total space count. Lots with 301 to 400 spaces need a minimum of 8 accessible spaces, while larger lots must dedicate a percentage of total spaces to accessibility under ADA guidelines.

How often should parking lot lines be repainted?

Most commercial lots need repainting every 1 to 2 years, though high-traffic lots or those exposed to harsh weather may need more frequent touch-ups to keep markings clear and effective.

Keep Traffic Moving With a Professionally Designed Parking Lot

A safe, efficient parking lot doesn’t happen by accident. It takes thoughtful layout decisions, the right traffic control measures, and consistent maintenance to keep vehicles and pedestrians moving safely through your property.

If your Indianapolis business is ready for a parking lot that works as hard as you do, ACI Asphalt & Concrete can help. From layout design to striping, repairs, and long-term maintenance, our team builds parking lots that keep traffic flowing and customers coming back. Contact us today to schedule your consultation.

Call Us Now

Related Posts:

Indiana Parking Lot Maintenance: Tips to Protect Your Pavement
Faded Parking Lines? When To Restripe Your Property
Transform Your Parking Lot with Effective Repair and Maintenance Strategies

Don’t Let Leaves Ruin Your Pavement: Leaf Clearance Tips

Autumn leaves make for a gorgeous backyard view, but they’re not doing your driveway any favors. Left alone, those piles of red and gold do more than create a mess—they quietly wear away at the asphalt and concrete beneath them.

For homeowners and property managers alike, leaf clearance is an easy task to put off. But pavement damage caused by decaying leaves can turn a simple weekend chore into a costly repair bill. The good news? A little seasonal diligence goes a long way toward protecting your investment.

This guide walks through why leaves are so damaging to pavement, how to spot the warning signs, and the best techniques for keeping your surfaces clean and crack-free all season long.

Leaf Clearing Pavement

Why Leaves Damage Your Pavement

It’s easy to assume a few leaves here and there are harmless. In reality, decomposing leaves set off a chain reaction that compromises pavement from the surface down.

Leaves Trap Moisture Against the Surface

As leaves pile up and begin to decay, they form a dense, soggy mat that clings to asphalt and concrete. This mat traps moisture against the surface far longer than an open, exposed area would experience. According to Reliable Contracting, fallen leaves still contain moisture when they first drop, and this moisture gradually leaches onto pavement, seeping into any existing cracks and causing them to widen over time.

Decaying leaves also release tannins and organic acids. These substances soak into the pores of asphalt and concrete, leaving behind stains and softening the material’s protective structure. For asphalt, that means weakened binding agents, which leads to rutting, depressions, and eventually potholes under the weight of vehicle traffic.

The Freeze-Thaw Cycle Makes It Worse

Cold climates add another layer of risk. When moisture trapped beneath leaf piles seeps into small cracks and then freezes, it expands—putting immense pressure on the surrounding pavement. As temperatures fluctuate between freezing and thawing, this cycle repeats, gradually turning hairline cracks into larger fractures and spalling.

Leaf Debris Blocks Drainage Systems

Piles of wet leaves don’t just sit still—they clump together and clog storm drains and gutters. Once drainage is blocked, water has nowhere to go but pool on the pavement surface, accelerating the very damage leaf clearance is meant to prevent. Beyond the pavement itself, decomposing leaves release phosphorus and nitrogen that can wash into local waterways, contributing to environmental concerns like algae blooms.

Signs Your Pavement Needs Leaf Clearance

Knowing what to look for can help you catch leaf-related damage before it escalates.

  • Dark staining or discoloration: Tannins from decaying leaves often leave behind persistent leaf-shaped imprints, especially after rainfall.
  • Wet spots that won’t dry: If certain areas of your pavement stay damp long after others have dried, blocked drainage may be to blame.
  • Soft spots or rutting in asphalt: These indicate the binding agents have already begun to weaken.
  • New surface cracks: Small cracks that seem to appear out of nowhere are often the result of trapped moisture and freeze-thaw stress.
  • Moss or algae growth: This is a telltale sign that moisture has been sitting on the surface for an extended period.

Best Methods for Leaf Removal

The right approach depends on the leaves themselves—dry and scattered leaves require different tools than the wet, matted piles left behind after a storm.

Manual Raking and Sweeping

Rakes remain the go-to tool for wet, compacted leaves that have started to mat together. Once the bulk of the pile is cleared, a push broom or stiff sweeper helps clean up any lingering residue, ensuring no slippery film is left behind on walkways or driveways.

Using Leaf Blowers Safely

For dry leaves, a leaf blower is faster and less labor-intensive than raking. Blowers work best on driveways, sidewalks, and parking lots where leaves haven’t yet become waterlogged. Just be mindful of local ordinances—many municipalities prohibit blowing leaves into the street or down storm drains, and doing so can result in fines.

Professional Equipment for Larger Properties

If you’re managing a commercial lot or a large residential property, professional pavement maintenance services can offer industrial-grade sweepers that clear leaves faster and more thoroughly than consumer tools. These services can also spot early warning signs of pavement damage that might otherwise go unnoticed.

Seasonal Leaf Clearance Schedule

Staying ahead of leaf accumulation is far easier than dealing with the aftermath.

Fall: Clear Frequently and Consistently

During peak leaf-fall season, aim to clear high-traffic areas once or twice a week. Don’t wait until every leaf has dropped to start cleaning—clearing leaves before it rains helps prevent tannin stains from setting into the pavement.

Winter: Prioritize Drainage

Before the first freeze, double-check that gutters and storm drains are free of leaf debris. Clear drainage prevents water from pooling and freezing on the surface, reducing the risk of freeze-thaw cracking throughout the winter months.

Spring: Final Cleanup

Once the snow melts, do a final sweep for any leftover leaf debris and check your pavement for signs of winter damage. Addressing small cracks early prevents them from growing into larger, costlier repairs.

Preventing Future Leaf Buildup

A few proactive habits can significantly cut down on the leaf clearance workload each year.

  • Trim nearby trees: Reducing overhanging branches means fewer leaves landing directly on your pavement.
  • Install or maintain drainage systems: Proper drainage keeps water moving instead of pooling, even when some leaf debris slips through.
  • Apply sealcoating: For asphalt surfaces, sealcoating every few years creates a protective barrier against moisture and acid intrusion, making cleanup easier and extending pavement life.
  • Stick to a routine: Treat leaf clearance like any other seasonal maintenance task, such as mowing the lawn or shoveling snow.

Common Leaf Clearance Mistakes to Avoid

Even well-intentioned homeowners can make missteps that do more harm than good.

  • Using pressure washers incorrectly. High-pressure water can force moisture deeper into existing cracks or strip away protective sealcoating if used improperly.
  • Leaving wet leaves too long. The longer decaying leaves sit, the more time tannins and acids have to seep into the pavement’s pores.
  • Ignoring drainage issues. Clearing leaves off the surface doesn’t help much if the drains beneath them stay blocked.

Frequently Asked Questions

How often should I clear leaves from my driveway?

During peak fall season, clear leaves at least once or twice a week, especially in high-traffic areas or regions with frequent rain.

Can leaves really damage concrete?

Yes. Leaves release tannins and organic acids that stain and weaken concrete, while trapped moisture contributes to freeze-thaw cracking over time.

What’s the best tool for leaf removal?

It depends on conditions—leaf blowers work well for dry leaves, rakes are better suited for wet, matted piles, and push brooms help with final cleanup.

When is the best time to clear leaves?

Clear leaves before rain events whenever possible, since wet leaves are more likely to leave behind tannin stains and trap moisture against the surface.

Protect Your Pavement This Season

Leaf clearance may seem like a minor chore, but it plays a major role in protecting your pavement from stains, cracks, and costly long-term damage. A consistent seasonal routine—paired with proper drainage and the right tools—can add years to the life of your asphalt or concrete.

If you’re noticing stains, cracks, or other signs of leaf-related wear on your property, ACI Asphalt & Concrete is here to help. Call ACI Asphalt & Concrete in Indianapolis, Indiana today for all your paving repair and sealcoating needs.

Call Now

Related Posts:

Protect Your Pavement: Why Timely Leaf Clearance Matters
Chemical Spill Cleanup: How to Protect Your Pavement Surfaces
Indiana Parking Lot Maintenance: Tips to Protect Your Pavement

Concrete Crack Repair: Should You Fill It or Seal It?

Cracks in concrete are almost inevitable. Concrete is strong when squeezed but roughly ten times weaker when pulled apart, so as it cures, shifts, and reacts to temperature swings, it eventually gives way to cracks. The good news? Most cracks can be repaired before they turn into costly structural problems.

When it comes to fixing them, two methods dominate the conversation: filling and sealing. While the terms are often used interchangeably, they serve very different purposes. Choosing the right one protects your driveway, patio, or foundation—and saves you money down the road.

This guide breaks down the key differences between filling and sealing, when to use each method, and what to consider before starting a repair.

Concrete Crack Filling vs Sealing

Filling vs. Sealing: Key Differences

Both methods repair cracks, but they solve different problems.

Crack filling repairs static cracks by packing material directly into the gap. It stops the crack from growing and blocks water and debris from getting in. Filling works best on wider, deeper cracks that aren’t actively moving.

Crack sealing creates a flexible, watertight barrier over and inside the crack. Because the sealant stays elastic, it expands and contracts as temperatures change—making it ideal for active cracks and hairline surface cracks that shift with the seasons.

Here’s the simplest way to think about it: filling addresses damage that has already stabilized, while sealing protects against ongoing movement and moisture intrusion.

When to Fill Concrete Cracks

Filling is the right call for cracks that are wider, deeper, and no longer moving.

Cracks Suited for Filling

Look for cracks that are stable and don’t widen or narrow between summer and winter. These “non-working” cracks often result from earlier settling or minor stress that has since leveled out. Wider gaps—those approaching or exceeding 1/8 inch—typically need filling rather than a thin surface treatment.

Materials and Process

For structural cracks, epoxy injection is the gold standard. Epoxy is a two-part resin that cures into a rigid, solid bond, effectively welding the concrete back together. In fact, cracked reinforced concrete repaired with epoxy can regain up to 85% of its original strength. Because epoxy has a low viscosity, it can also penetrate narrow, hairline structural cracks.

One important note: epoxy needs a dry or only slightly damp surface to bond properly. It doesn’t react well with active water leaks.

Durability and Cost

Filling is generally the more affordable option. It restores strength and blocks moisture, but rigid fillers don’t flex with movement. If used on an active crack, a rigid repair can simply crack again beside the original fix. For stable cracks, though, a proper fill delivers a long-lasting result.

When to Seal Concrete Cracks

Sealing is designed for cracks that move, along with the fine surface cracks that appear as concrete ages.

Cracks Suited for Sealing

Hairline cracks (less than 1/16 inch) are common and often cosmetic, but they still let in groundwater and moisture vapor. Sealing these early prevents bigger problems later. Active or “working” cracks—those that expand and contract with temperature changes—also call for a flexible sealant that can move without breaking.

Materials and Process

Sealing relies on flexible materials that stay semi-elastic after curing. Common choices include:

  • Water-based siliconized latex caulks for minor surface cracks
  • Polyurethane sealants for wet or leaking cracks
  • Self-leveling silicone for horizontal surfaces

Polyurethane is especially useful because it reacts with moisture, expands to fill irregular voids, and remains flexible to accommodate future movement. That makes it a strong choice for cracks where water is actively getting in.

Preventative Benefits and Cost

Sealing costs more upfront than filling, but it delivers all-weather protection and a longer service life. By keeping moisture out and flexing with the concrete, sealing helps prevent the freeze-thaw damage, spalling, and heaving that lead to expensive repairs later.

Factors to Consider When Choosing

The right method depends on more than just the crack in front of you.

Crack width and depth. Industry standards from the American Concrete Institute point to 1/8 inch as a key threshold. Cracks wider than that warrant closer inspection and likely a more robust repair.

Age and condition of the concrete. Older slabs with multiple cracks may need a broader assessment rather than a spot fix.

Climate. This matters a great deal in Indianapolis. Central Indiana sees hot summers and freezing winters, and those freeze-thaw cycles put constant stress on concrete. Because temperature swings cause rigid fills to deteriorate faster, flexible sealing is often the smarter long-term investment in our region.

Budget and timeline. Filling offers a quick, lower-cost fix. Sealing requires more investment but pays off through added durability.

Hiring a Professional Pavement Repair Company

When it comes to concrete crack filling and sealing, hiring a professional pavement repair company is often the wisest choice. Experienced professionals bring specialized equipment and industry knowledge that ensure the job is done efficiently and effectively. They understand the complexities of evaluating crack severity, selecting the right materials, and applying them in a way that maximizes durability and longevity.

Additionally, working with a reputable company can save you valuable time while reducing the likelihood of errors that could lead to higher costs down the road. Always look for a company with positive reviews, proper licensing, and a proven track record in your local area to ensure your pavement receives the care it deserves.

Frequently Asked Questions

Can you seal a crack that’s already been filled?

Yes. Applying a flexible sealant over a filled crack can add an extra layer of moisture protection, especially in climates with heavy freeze-thaw activity. Just make sure the filled crack is clean, cured, and stable first.

How long do filled cracks typically last?

It depends on the material and the crack. A properly executed epoxy repair on a stable crack can last for years. However, fills used on active cracks or in harsh climates may deteriorate much sooner and need reapplication.

Is sealing concrete a temporary or permanent solution?

Sealing is a long-term solution. Because the material stays flexible and keeps water out, quality sealing can protect concrete for many years, often outlasting a simple fill.

Can I fill or seal cracks myself, or do I need a professional?

Small, cosmetic cracks can sometimes be handled with a DIY kit. But roughly half of concrete repairs fail, usually due to poor diagnosis or preparation—like treating an active structural crack with a rigid material. If you’re seeing wide, horizontal, or actively moving cracks, a professional evaluation is well worth it.

The Bottom Line

Filling and sealing both extend the life of your concrete, but they solve different problems. Filling restores strength in stable, wider cracks, while sealing protects against moisture and movement in active or hairline cracks. Matching the method to the crack—and to Indiana’s demanding climate—is what makes a repair last.

Not sure which approach your concrete needs? The team at ACI Asphalt & Concrete in Indianapolis can assess the damage, recommend the right solution, and handle the repair with professional precision. Reach out today for an expert evaluation and protect your investment for years to come.

Call Now

Related Posts:

Why Crack Filling Saves Your Pavement
Cracks in Commercial Pavements: Causes, Implications and Prevention Strategies
How to Repair Concrete Cracking and Minor Damages

Asphalt Cold Planing vs. Asphalt Milling: What’s the Difference?

If you manage a commercial property, you’ve likely heard the terms “cold planing” and “asphalt milling” used almost interchangeably. That’s because they describe closely related processes—both use heavy machinery to grind away worn asphalt and prepare a surface for repair. But the way each method is applied can make a real difference in your project’s cost, timeline, and results.

Knowing the distinction helps you ask the right questions and choose the right approach for your pavement. In this guide, we’ll break down what cold planing and asphalt milling actually involve, how they compare, and how to decide which one fits your needs.

Asphalt Cold Planing vs Milling
Asphalt Cold Planing vs. Milling

What Is Asphalt Cold Planing?

Asphalt cold planing is the controlled removal of the top layer of an asphalt surface using a rotating drum fitted with carbide-tipped cutting teeth. The word “cold” refers to the process itself: the asphalt is ground away mechanically, without any heating involved. This preserves the integrity of the layers below and keeps energy use low.

The Equipment and Process

Cold planers use a large rotary drum studded with thousands of cutting teeth. The drum’s depth and speed can be finely adjusted, and modern machines rely on GPS or laser guidance to achieve millimeter-level accuracy. Water is applied to the drum during operation to control heat and dust.

Common Applications

Cold planing shines when precision matters. Typical uses include:

  • Preparing a surface for a fresh asphalt overlay
  • Correcting surface distresses like rutting, raveling, and shoving
  • Adjusting grade to improve drainage
  • Maintaining proper curb heights and clearances

Benefits of Cold Planing

Because it removes only a controlled depth—often one to four inches—cold planing is ideal for surface restoration. It creates a textured, clean surface that bonds well with new asphalt, all while leaving the underlying structure intact.

What Is Asphalt Milling?

Asphalt milling uses the same core technology as cold planing: a rotating drum with cutting teeth that grinds up existing pavement. In practice, though, the term “milling” is often applied to deeper or more extensive removal, especially when the goal is to recycle asphalt or address structural problems.

The Equipment and Process

Milling machines range from compact skid-steer attachments to large, self-propelled units with 350 to 400 horsepower engines. Larger machines feed the ground-up asphalt onto a conveyor belt that loads it directly into a dump truck. Depths can reach 12 inches or more for full-depth removal.

Common Applications

Milling is frequently the go-to when material recycling and deeper repair are priorities. Common applications include:

Benefits of Milling

The ground-up material—RAP—can be combined with new aggregate and binder to create fresh asphalt, which cuts waste and reduces environmental impact. Milling and overlay can also deliver many of the benefits of a full replacement at roughly half the cost, as long as the base is sound.

Key Differences Between Cold Planing and Milling

While the two overlap, a few practical differences stand out.

Equipment and Precision

Cold planing typically leans on precise, laser- or GPS-guided machines for shallow, exact removal. Milling covers a broader range of equipment and depths, from small attachments to heavy-duty machines built for deep cuts.

Cost

Milling costs are usually priced by the square yard or lane mile. According to Michigan Paving & Materials (2025), typical rates run:

  • Basic milling (1–2 inches deep): $2.50 to $5.00 per square yard
  • Medium-depth milling (2–4 inches): $5.00 to $8.00 per square yard
  • Deep milling (4+ inches): $8.00 to $12.00 per square yard

Depth, project size, traffic control, and disposal fees all influence the final price.

Environmental Impact

Both methods avoid heating asphalt, which lowers emissions. Milling stands out for its recycling potential, turning old pavement into reusable RAP.

When to Choose Each

Choose cold planing for surface-level restoration and overlay prep. Choose milling when you need deeper removal, structural correction, or material recycling on a larger scale.

Cold Planing vs. Milling: Quick Comparison

FeatureCold PlaningAsphalt Milling
Typical depth1–4 inchesUp to 12+ inches
Primary goalSurface restoration & overlay prepRecycling & structural repair
PrecisionVery high (laser/GPS guided)Varies by machine
Best forResurfacing projectsFull-depth reclamation
Material reusePossibleCommon (RAP)

Which Method Is Right for Your Project?

The right choice comes down to the condition of your pavement and your goals. If your surface is structurally sound but worn or uneven, cold planing and an overlay may be all you need. If the damage runs deeper—reaching the base or requiring full reconstruction—milling is likely the better fit.

Factors like project size, budget, timeline, and drainage needs all play a role. Because the terms overlap so much in everyday use, the best step is to have an experienced asphalt cold planning contractor evaluate your site and recommend the right approach.

Frequently Asked Questions

Can cold planing and milling be used together?

Yes. Many projects use milling to remove a damaged layer, then finish with a fresh overlay. The two processes often work hand in hand within a single job.

How much does asphalt milling cost?

Costs typically range from $2.50 to $12.00 per square yard, depending on depth. Deeper cuts, smaller project sizes, and added traffic control tend to raise the price.

Is the material from milling reusable?

Absolutely. Milled asphalt becomes reclaimed asphalt pavement (RAP), which can be recycled into new pavement, road base, or trench backfill.

How long do the results last?

When paired with a quality overlay and a sound base, a milled and resurfaced pavement can last many years. Regular maintenance, like sealcoating and crack filling, extends that lifespan further.

Choose the Right Approach

Cold planing and milling may look similar on the surface, but the details—depth of cut, overall cost, and intended purpose—determine which approach is right for your property. Choosing the correct method isn’t just a technical decision; it’s a practical one that can have a real impact on the longevity of your pavement and the efficiency of your budget. When in doubt, working with an experienced contractor can help you weigh your options and avoid costly mistakes down the road.

Serving Central Indiana since 1981, ACI Asphalt & Concrete brings decades of hands-on experience to every milling and overlay project. Our licensed, bonded, and insured team will walk your site, explain your options, and provide a clear, honest estimate. Call us at 317-549-1833 or reach out online for your estimate.

Call Us Now

Related Posts:

Pavement Milling and Overlays: A Complete Guide
The Benefits of Asphalt Milling and Overlays for Road Maintenance
Why Your Asphalt Pavement Might Need a Pitch Adjustment

Does Your Business Need a Designated Pedestrian Walkway?

A customer trips on uneven pavement outside your front door. A delivery worker cuts across your parking lot with no clear path to follow. A visitor in a wheelchair can’t find an accessible route to your entrance. These aren’t hypothetical scenarios—they’re the kinds of incidents that happen on commercial properties every day, and they carry real consequences for business owners.

Adding a designated pedestrian walkway to your property is one of the most practical investments you can make. Done right, it protects people, reduces your legal exposure, and signals to customers that their safety matters. But there’s more to it than simply pouring concrete from point A to point B. From material selection to ADA compliance, several important considerations come into play before a single shovel hits the ground.

Installing Pedestrian Walkways in Indianapolis

Why Pedestrian Walkways Are Essential for Your Business

The numbers make a strong case on their own. According to the National Council on Compensation Insurance (NCCI), the average compensation claim for a slip-and-fall injury was $51,047 as of 2022. Premises liability lawsuits can push settlements far higher—often into the $50,000 to $150,000 range for trip-and-fall cases on commercial properties.

Beyond the financial risk, a well-designed walkway improves the overall customer experience. Clear, safe paths make it easier for everyone—including elderly visitors, parents with strollers, and people with disabilities—to access your building comfortably. That kind of accessibility builds trust and keeps people coming back.

There’s also the matter of curb appeal. A clean, defined walkway gives your property a polished, professional appearance that reflects well on your business before a customer even walks through the door.

Planning Your Pedestrian Walkway Project

Before any materials are ordered, take time to assess your property carefully. Walk the site and observe how foot traffic naturally flows—where do people tend to walk? Where do pedestrians and vehicles currently share space? Identifying these patterns helps determine the most logical and safest placement for your walkway.

Determining Width and Placement

Width matters both for safety and compliance. The Americans with Disabilities Act (ADA) sets a federal minimum clear width of 36 inches, but most commercial properties require 42 to 48 inches or wider, depending on foot traffic volume and local code requirements. If your walkway narrows below 60 inches, ADA standards also require passing spaces—60 by 60 inches—at intervals no greater than 200 feet.

Placement should prioritize direct connections between high-traffic arrival points: accessible parking spaces, main entrances, loading areas, and public sidewalks.

Budgeting for the Project

Costs vary based on materials, site conditions, and project scope. Concrete installation for commercial walkways typically runs between $12 and $30 per square foot, while asphalt is often a more affordable option for certain configurations. Factor in drainage work, line markings, and any ADA ramp construction as part of your total budget. It’s also worth noting that small businesses may qualify for a federal tax credit of up to $5,000 per year under IRS Section 44 for accessibility improvements, with an additional deduction of up to $15,000 per year under IRS Section 190—potentially offsetting up to $20,000 in compliance-related spending annually.

Materials and Design Options

Choosing the right material depends on your property’s traffic patterns, climate, and budget.

Popular Walkway Materials

Concrete is the most common choice for commercial pedestrian walkways. It’s durable, long-lasting, and handles heavy foot traffic well. Concrete surfaces are also easier to maintain at ADA-compliant slopes over time.

Asphalt offers flexibility and affordability, making it a good option for larger walkway areas or properties that already use asphalt for parking lots and driveways. It’s also faster to install.

Permeable paving manages stormwater runoff by allowing water to pass through the surface rather than pooling. This can be a smart option for properties with drainage challenges or for businesses looking to meet environmental goals.

Design Considerations

ADA compliance isn’t optional—it’s a legal requirement with real enforcement teeth. Federal penalties for violations can reach $75,000 for a first offense and $150,000 for subsequent violations. More than 10,000 ADA Title III lawsuits are filed annually across the United States, making proactive compliance far less costly than reactive lawsuit defense.

Key design requirements include:

  • Cross slope no greater than 2%—with zero tolerance for exceeding this measurement
  • Running slope no greater than 5% (anything steeper is classified as a ramp, which triggers additional requirements)
  • Trip hazard threshold of no more than ¼ inch vertical displacement at any joint or crack
  • Curb ramps where the walkway meets a vehicular area, with a maximum slope of 1:12 (8.33%)

Drainage and weather resistance are also critical design factors, particularly for businesses in Indiana, where freeze-thaw cycles can cause concrete to heave and settle over time.

Safety Features to Include

A compliant surface is just the starting point. Several additional features make a walkway genuinely safe for all users.

Lighting is non-negotiable for any walkway that sees use after dark. Adequate illumination helps pedestrians identify hazards and deters security risks.

Non-slip surfaces reduce accident risk, especially in wet or icy conditions. Textured concrete finishes and anti-slip coatings are both practical options.

Clear markings and signage help direct pedestrians away from vehicle traffic zones. High-visibility paint, wayfinding signs, and detectable warning surfaces (truncated dome panels) at curb transitions all contribute to a safer, more legible environment.

Adequate width for wheelchair users isn’t just a compliance checkbox—it makes your property genuinely accessible to a broader range of customers and visitors.

Installation and Professional Guidance

Pedestrian walkway installation on commercial properties isn’t a DIY project. Proper base preparation, slope grading, and drainage work require experience and equipment that most property owners don’t have on hand.

Hiring a qualified Indianapolis paving contractor ensures the work is done to code and built to last. A professional will assess existing site conditions, recommend appropriate materials, and handle the grading and compaction that determines long-term surface performance.

Minimizing Business Disruption

Timing matters. Work with your contractor to schedule installation during lower-traffic periods—early mornings, weekends, or between seasons—to reduce disruption to your customers and employees. A phased approach can keep at least partial access open throughout the project.

Maintenance and Long-Term Care

A pedestrian walkway is an ongoing responsibility, not a one-time installation. Concrete and asphalt both shift over time due to soil settlement, tree root pressure, and seasonal freeze-thaw cycles in Indiana.

Schedule regular pavement inspections—at least annually—to check for cracked surfaces, trip hazards above the ¼ inch threshold, faded markings, and any damage to detectable warning panels. Document your inspections with photographs and repair records. That documentation can be valuable evidence of good faith if a premises liability claim ever arises.

Seasonal maintenance is especially important in Indiana. Winter de-icing chemicals can degrade surface coatings, and spring thaw often reveals new settlement or cracking that needs attention before it becomes a safety hazard.

Frequently Asked Questions

How wide does a commercial pedestrian walkway need to be?

The ADA federal minimum is 36 inches, but most commercial properties should plan for 42 to 48 inches or wider. Always verify local code requirements in addition to federal standards.

Is asphalt or concrete better for a commercial walkway?

Concrete is generally preferred for pedestrian walkways due to its durability, long lifespan, and ease of maintaining ADA-compliant slopes. Asphalt is a cost-effective alternative in certain configurations, particularly for larger areas. Your contractor can recommend the best option based on your site conditions and budget.

How long does walkway installation take?

Most commercial walkway projects take one to several days depending on scope and site conditions. Concrete requires a curing period of several days before it can be opened to foot traffic.

Do I need a permit to install a walkway on my commercial property?

In most jurisdictions, yes. Commercial paving projects typically require permits, especially if they involve ADA ramp construction or connections to public sidewalks. A licensed contractor will be familiar with local permit requirements.

How often should I inspect my walkway?

At minimum, once per year—and after any significant weather event, freeze-thaw cycle, or nearby construction that could affect soil stability. Promptly repair any trip hazard exceeding ¼ inch to maintain both safety and compliance.

Put Safety First on Your Property

A well-built pedestrian walkway does more than check a compliance box. It protects your customers, reduces your liability exposure, and communicates that your business takes safety seriously—because it does.

If you’re ready to add or upgrade a designated pedestrian walkway at your commercial property in Indianapolis or Central Indiana, ACI Asphalt & Concrete is here to help. We provide professional sidewalk and walkway installation, ADA-compliant ramp construction, concrete and asphalt paving, and more—all backed by an A+ BBB rating and a commitment to getting the job done right. Request an estimate today.

Call Us Now

Related Posts:

How to Modify a Parking Lot to Promote Pedestrian Safety
Ensuring Safety and Security: Top Tips for Parking Lot Management
Sidewalk Replacement Cost: Your Average Price Guide

Indiana Parking Lot Maintenance: Tips to Protect Your Pavement

Indiana winters are no joke. Between the freeze-thaw cycles, heavy snowfall, and de-icing chemicals, commercial parking lots in the state take a serious beating every year. The good news? Most of the damage is preventable.

Whether you manage a retail center, office complex, or industrial facility in Indianapolis, a consistent parking lot maintenance routine is one of the smartest investments you can make. Not only does it extend the life of your pavement, but it also reduces long-term repair costs and protects your business from liability. This guide covers everything you need to know—from seasonal care and common problem areas to essential maintenance tasks and budgeting strategies.

Parking Lot Maintenance

How Indiana’s Climate Affects Your Parking Lot

Central Indiana sits in a climate zone where winter temperatures regularly oscillate around the freezing point. Unlike states farther north, where the ground stays frozen for weeks at a time, Indianapolis and surrounding communities experience repeated freeze-thaw cycles throughout the winter season—often dozens between November and March alone.

Here’s why that matters. When water seeps into small cracks in your asphalt and freezes overnight, it expands by roughly 9%, pushing outward against the surrounding pavement. When temperatures rise above freezing the following afternoon, that ice melts and leaves a slightly larger void behind. Repeat this process dozens of times in a single season, and what started as a hairline crack can become a gaping pothole by spring.

Indiana’s clay-heavy soils make the problem worse. Clay retains moisture and drains poorly, meaning water lingers in the subgrade longer than it would in sandier soils. When that trapped moisture freezes, the heaving and base disruption can be significant.

Seasonal Parking Lot Care in Indiana

Spring: Assess the Damage

Spring is the most critical time to inspect your lot. As temperatures stabilize above 50°F—typically from April through June—you’ll get a clear picture of the damage winter left behind. Look for new cracks, potholes, heaving, and any areas where water is pooling due to grade changes or blocked drains.

Spring is also the ideal window for pothole repair and crack filling, since warm, dry conditions allow asphalt products to cure properly. Don’t wait too long. Potholes and open cracks allow water to infiltrate the base layers, setting up another cycle of damage next winter.

Summer: UV Protection and Maintenance

Summer heat brings its own set of challenges. Prolonged UV exposure oxidizes the asphalt binder, causing it to dry out, fade, and become brittle over time. This is the best season for sealcoating, which protects the surface from UV rays, fuel spills, and moisture.

Summer is also a good time to address line striping. Faded markings create confusion for drivers and pedestrians, and in high-traffic lots, they can create real safety hazards.

Fall: Prepare for the Freeze

Fall is your last chance to seal cracks before the first hard freeze. Professional crack sealing is most effective when performed between September and November. At that point, a hot-pour rubberized sealant can be applied into the cracks to flex with the pavement through temperature changes and block water entry throughout winter.

Check your drainage system during fall inspections, too. Clear catch basins and repair any low spots where water tends to pool. Water that drains off your pavement quickly cannot freeze inside it.

Winter: Smart Snow Management

Snowplows and de-icing chemicals are hard on asphalt. Plow blades set too low can scrape and damage pavement surfaces, while salts and de-icers—though necessary—increase the frequency of freeze-thaw cycles by repeatedly lowering and raising the melting point of surface water. Use de-icers sparingly and opt for less aggressive products where possible. Rubber-tipped plow blades help reduce surface damage.

Common Parking Lot Problems in Indiana

Potholes and Cracking

Potholes are the most visible—and dangerous—result of freeze-thaw damage. Pothole season in Indiana typically peaks in late February and March, when months of accumulated freeze-thaw cycles combine with early spring rainfall. Surface cracking, including alligator cracking (the interconnected, scaly pattern that signals base failure), is equally common and tends to worsen rapidly if left unaddressed.

Asphalt Oxidation and Fading

Over time, sun and weather exposure causes asphalt to lose its deep black color and become gray and brittle. This oxidation is a sign the binder is degrading, making the surface more vulnerable to cracking and water infiltration. Regular sealcoating is the most effective way to slow this process.

Poor Water Drainage

Standing water is one of the leading causes of premature pavement failure. If your lot has low spots, blocked drains, or insufficient grading, water has more time to penetrate the surface and weaken the base. A drainage assessment twice a year—once in spring and once in fall—can catch problems before they escalate.

Faded Line Markings

Faded striping, worn crosswalks, and unclear directional markings aren’t just cosmetic issues. They create safety risks for drivers and pedestrians and can create ADA compliance concerns. Line striping should be refreshed regularly, ideally alongside sealcoating projects.

Essential Parking Lot Maintenance Tasks

Regular Sweeping and Debris Removal

Routine sweeping keeps dirt, debris, and organic material from accumulating on the surface. Decomposing leaves and mulch retain moisture against the pavement, accelerating deterioration. A clean lot also gives you a clearer view of emerging crack patterns and damage.

Crack Sealing

Crack sealing is one of the highest-return maintenance activities available. Sealing cracks early stops water from reaching the base layers, preventing the progressive damage that makes repairs exponentially more expensive. A small crack today is a pothole next spring if left unsealed.

Sealcoating

Sealcoating creates a waterproof barrier that protects asphalt from UV rays, water, oil, and chemical spills. For high-traffic commercial lots, sealcoating every one to two years is recommended. Moderate-traffic properties—like office parks or medical facilities—can typically wait two to three years between applications.

New asphalt should cure for six to twelve months before the first sealcoat is applied. After application, most lots can reopen to vehicle traffic within 24 to 48 hours under warm, sunny conditions.

Pothole Repair

When potholes appear, repair them promptly. A small pothole that’s patched quickly stops water from reaching the base layers. Leaving it open allows each subsequent freeze-thaw cycle to expand the damage further—turning a minor pothole patching job into a full-depth repair or reconstruction project.

Budget-Friendly Maintenance Strategies

Preventative Care Is Always Cheaper

The cost comparison is stark: crack sealing a parking lot costs a fraction of pothole repair. Pothole repair costs a fraction of full-depth patching. And full-depth patching costs a fraction of complete mill-and-overlay resurfacing. Every stage of deterioration you skip by delaying maintenance multiplies the final repair bill. Preventative care—sealcoating, crack sealing, and drainage maintenance—is the single most cost-effective approach to parking lot management.

Professional Services vs. DIY

Some minor tasks, like basic debris removal, can be handled in-house. But crack sealing, sealcoating, and pothole repair are best left to licensed asphalt professionals. Improper sealcoating—applied when temperatures are too low, over a wet surface, or in coats that are too thick—can cause peeling, poor adhesion, and premature failure, costing more to fix than professional work would have cost in the first place.

Build a Maintenance Schedule

Documenting your lot’s repair history helps you identify patterns, plan ahead, and budget accurately. A professional parking lot paving contractor can develop a multi-year maintenance plan tailored to your property’s traffic volume, drainage characteristics, and current condition.

FAQ

How often should a parking lot be sealcoated?

High-traffic commercial lots benefit from sealcoating every one to two years. Moderate-traffic properties can typically extend that to every two to three years. The right schedule depends on your lot’s usage, exposure, and current condition.

What causes asphalt to deteriorate quickly?

The leading causes of rapid deterioration in Indiana are freeze-thaw cycles, poor drainage, UV oxidation, and deferred maintenance. Each factor compounds the others—a lot with drainage issues will deteriorate far faster than one with proper grading and a consistent sealcoating schedule.

Is pothole repair worth the cost?

Absolutely. Prompt pothole repair prevents water from reaching the base layers and stops progressive damage in its tracks. Leaving potholes unaddressed also creates liability exposure for vehicle damage and slip-and-fall claims.

How do I know if I need to repair or fully repave my lot?

Resurface if the base is structurally sound and the damage is limited to the surface layer. Full replacement is warranted when there is widespread alligator cracking, significant base failure, or potholes that keep returning shortly after patching—a clear sign that the underlying structure has been compromised.

Protect Your Parking Lot Before the Next Season

A well-maintained parking lot reflects the professionalism of the business it serves. It protects your customers, limits liability, and saves you from far more expensive repairs down the road. The key is consistency: inspect regularly, address damage early, and stick to a seasonal maintenance routine.

Ready to get started? Request a quote from ACI Asphalt & Concrete in Indianapolis today. Our team provides expert parking lot paving, repair, sealcoating, and crack sealing services for commercial properties across central Indiana.

Call Now

Related Posts:

Faded Parking Lines? When To Restripe Your Property
Top Vegetation Control Tips for Concrete Pavements
FAQS About ADA Parking Lot Compliance in Indiana

Cracked Speed Bumps in Your Parking Lot: What Business Owners Need to Know

Speed bumps do a quiet but critical job. Day after day, they slow vehicles, protect pedestrians, and reduce accidents in parking lots. But like any pavement feature, they don’t last forever—and when they start to crack, crumble, or fade, the consequences can be more serious than most business owners expect.

The problem is that speed bump deterioration tends to happen gradually. A small crack here, some faded paint there—it’s easy to put off repairs when the damage seems minor. But left unaddressed, that minor damage can escalate into a genuine safety hazard, a liability risk, and an expensive replacement project.

This guide breaks down why speed bumps deteriorate, what warning signs to watch for, and what your options are when it’s time to repair or replace them.

Broken or Cracked Speed Bumps? Call 317-549-1833 Today.

Why Speed Bumps Deteriorate Over Time

Speed bumps take a beating. Every vehicle that passes over one applies direct force to the pavement structure—and in a busy commercial parking lot, that adds up fast. But heavy traffic isn’t the only culprit.

Freeze-Thaw Cycles

For business owners in Indianapolis, winter weather is one of the most destructive forces acting on your parking lot. When moisture seeps into small surface cracks and then freezes, it expands. That expansion puts tremendous pressure on the surrounding asphalt or concrete, widening cracks and breaking apart the material from the inside out. Each freeze-thaw cycle compounds the damage, and Indiana’s winters provide plenty of them.

UV Exposure and Oxidation

Sunlight degrades asphalt over time. UV rays cause the binders in asphalt to oxidize, making the surface brittle and more prone to cracking. This is also why speed bump markings—the yellow or white paint that makes them visible—fade so quickly. A speed bump that’s lost its markings is one that drivers may not see in time to slow down.

Heavy Traffic and Repeated Impact

Delivery trucks, SUVs, and service vehicles exert far more force on speed bumps than standard passenger cars. Over time, this repeated impact breaks down the structural integrity of both asphalt and concrete speed bumps, especially near the edges where the material is thinnest.

Poor Installation and Age

Even a well-built speed bump has a finite lifespan. According to industry data, asphalt speed bumps typically last 8–12 years before requiring restoration, while concrete installations can remain effective for 15–20 years with proper maintenance. When installation quality is poor—inadequate compaction, wrong materials, or improper dimensions—deterioration begins much sooner.

The Safety and Liability Risks You Can’t Ignore

A cracked or crumbling speed bump isn’t just an eyesore. It’s a hazard.

Vehicle Damage and Pedestrian Risks

When a speed bump shifts or breaks apart, sharp edges and raised chunks of asphalt can damage tires, wheel rims, and undercarriage components. Pedestrians, especially those using mobility aids or navigating the lot at night, can trip on uneven or missing sections. Faded markings make the bump nearly invisible to drivers approaching at speed.

Your Legal Exposure as a Property Owner

As a commercial property owner, you have a legal duty to maintain your parking lot in a reasonably safe condition. That duty extends to speed bumps. If a customer, employee, or visitor is injured or their vehicle is damaged because of a deteriorated speed bump you knew about—or should have known about—you can be held liable.

Establishing negligence in these cases typically involves proving that the property owner owed a duty of care, breached that duty by failing to maintain the property, and that the breach directly caused the injury or damage. Damaged, poorly marked, or structurally compromised speed bumps make that case easier to prove.

Regular inspections and prompt repairs are your best legal protection.

What It Costs to Delay Repairs

Small problems rarely stay small in pavement maintenance. A hairline crack that could have been sealed for a few dollars per linear foot can widen into a structural failure that requires full reconstruction. The financial math is unforgiving.

Research from PaveConnect found that a preventive maintenance approach can save property owners up to 37% of total cost per year compared to a reactive approach—where repairs only happen after something fails. Emergency repairs require more materials, more labor, and often more time without a fully functional parking lot.

Beyond direct repair costs, there’s the less obvious cost of perception. Customers notice a neglected parking lot. Crumbling infrastructure sends a message about how a business values its property—and by extension, how it values its customers.

How to Assess Speed Bump Damage

Before calling a contractor, it helps to know what you’re looking at.

Visual Warning Signs to Watch For

Walk your parking lot and look for:

  • Deep cracks or fractures running across or along the speed bump
  • Missing chunks or crumbling edges, particularly at the base of the bump
  • Faded or invisible pavement markings, making the bump hard to see
  • Surface raveling, where the asphalt surface has loosened and begun to break apart
  • Settlement or shifting, where the speed bump has sunk, tilted, or separated from surrounding pavement

When to Repair vs. When to Replace

Minor surface cracking and faded markings can often be addressed with patching and repainting. But if a speed bump has lost structural integrity—significant missing material, deep cracking, or visible shifting—repair may only be a temporary fix. In those cases, full replacement is typically the more cost-effective long-term solution.

A professional parking lot paving assessment will give you a clearer answer than a visual inspection alone.

Repair and Replacement Options

Patching and Crack Sealing

For speed bumps with surface-level cracking, hot-pour crack sealant or asphalt patching material can prevent water infiltration and slow further deterioration. This is a cost-effective solution when the underlying structure is still sound.

Pavement Marking Refresh

Faded yellow or white speed bump markings can be repainted at relatively low cost. This simple step restores visibility and reduces accident risk almost immediately—it’s one of the most impactful quick fixes available.

Full Replacement

When a speed bump is structurally compromised, replacement is the right call. A new asphalt speed bump, properly installed, can last 15–25 years. The upfront investment pays for itself many times over compared to repeated asphalt patching on a failing structure.

Sealcoating for Preventive Protection

Applying a sealcoat to your parking lot—including speed bumps—creates a protective barrier against UV rays, water infiltration, and oxidation. Sealcoating every 2–3 years is one of the most effective preventive maintenance strategies available to property owners.

Frequently Asked Questions

How often should speed bumps be inspected?

Speed bumps should be visually inspected at least twice a year—ideally in spring after freeze-thaw season, and again in fall before winter weather sets in. Any visible damage should be assessed by a professional promptly.

Can damaged speed bumps be temporarily fixed?

Minor cracks can be sealed temporarily using commercial crack filler, but this is not a long-term solution. Temporary fixes slow deterioration; they don’t restore structural integrity. A professional assessment will determine whether a permanent repair or replacement is needed.

What is the typical lifespan of a speed bump?

Asphalt speed bumps typically last 8–12 years before requiring restoration, with a potential lifespan of 15–25 years with regular maintenance. Concrete installations can last 15–20 years with proper upkeep. Rubber speed bumps have a shorter lifespan of 3–10 years.

How much does speed bump repair or replacement cost?

Costs vary based on material, size, and extent of damage. Asphalt speed bump installation typically ranges from $1,500 to $5,000. Preventive crack sealing is significantly more affordable, often running $0.50 to $3 per linear foot. Getting a professional on-site estimate is the most reliable way to understand your specific costs.

Keep Your Parking Lot Safe—Before Small Problems Become Expensive Ones

Damaged speed bumps don’t fix themselves. What starts as surface cracking can turn into a structural failure—and a safety liability—faster than most property owners expect. Regular inspections, timely repairs, and a proactive maintenance plan are the most effective tools you have.

ACI Asphalt & Concrete serves business owners across Indianapolis with professional parking lot maintenance, speed bump repair, and full replacement services. Whether you’re dealing with visible damage or just want a professional assessment of your lot’s condition, our team is ready to help. Contact us today to schedule your estimate.

Call Now

Related Posts:

Concrete Parking Lot Repair: Where to Begin
Faded Parking Lines? When To Restripe Your Property
Choose ACI for Bollard Post Services in Indiana

Why Your Asphalt Pavement Might Need a Pitch Adjustment

A puddle forming in the same spot after every rain might seem like a minor annoyance. But for property owners with asphalt driveways, parking lots, or walkways, that puddle is often the first visible sign of a deeper problem—one that can quietly accelerate pavement deterioration if left unaddressed.

Asphalt pavement pitch refers to the slope of the surface, which is engineered to direct water away from the pavement and toward designated drainage points. When that pitch is off, even slightly, water has nowhere to go. It sits. It seeps. And over time, it does serious damage.

This guide covers the key reasons you may need to adjust the pitch of your asphalt pavement—and why acting early is almost always the smarter (and cheaper) choice.

Asphalt Pitch Adjustment

Signs Your Asphalt Needs a Pitch Adjustment

Water Pooling After Rain

Standing water is the most obvious sign that your asphalt pitch needs attention. Asphalt pavement should maintain at least a 1% slope to ensure effective drainage. Modern standards for commercial surfaces recommend slopes between 2% and 4%. When that slope is insufficient or has shifted over time, water becomes trapped in low-lying areas rather than flowing toward a catch basin or drain.

A good rule of thumb: if water is still visible on your pavement several hours after rainfall, you likely have a drainage problem.

Uneven Surfaces and Safety Hazards

Low spots and surface depressions don’t just collect water—they create genuine safety risks. In Indianapolis winters, standing water freezes overnight and turns into hazardous ice patches by morning. Pedestrians and drivers can both fall victim to these invisible hazards. If you’re noticing unevenness across your pavement, it’s worth having a professional assess whether pitch correction is needed.

Cracks Following Pooling Areas

Pay attention to where cracks are developing. When water consistently pools in a specific area, it gradually penetrates asphalt pores and the cracks that form nearby. According to PTG Enterprises, water breaks down the bond between rocks, sand, and the asphalt binder—an oil-based material that, like all oils, doesn’t mix well with water. Over multiple freeze-thaw cycles, this infiltration causes the damage to compound, resulting in what’s commonly called “alligator cracking”—a web-like pattern of surface fractures that signal structural failure.

Benefits of Proper Asphalt Pitch

Improved Drainage and Longer Pavement Life

Correct pitch means water moves off your pavement quickly and consistently. This single factor has an outsized impact on pavement longevity. Water that drains away promptly can’t infiltrate the surface layer, weaken the sub-base, or contribute to freeze-related cracking. Properly graded pavement simply lasts longer—and requires less frequent repair.

Enhanced Safety for Vehicles and Pedestrians

Eliminating standing water reduces the risk of hydroplaning for vehicles and slip-and-fall accidents for pedestrians. This is especially important for commercial property owners who carry liability for what happens on their lots.

Cost Savings Through Preventive Maintenance

Pitch problems that are caught and corrected early are significantly cheaper to fix than full-scale pavement failures. Resurfacing a correctly graded lot is a straightforward process. Rebuilding a lot where the sub-base has been undermined by years of moisture infiltration is not.

Common Causes of Asphalt Pitch Problems

Natural Ground Settling Over Time

Even well-installed pavement shifts over time. Soil compaction beneath the surface, the natural movement of the ground, and changes in moisture content all cause the sub-base to settle. Clay-heavy soils, which are common throughout Indiana, are particularly prone to movement as they absorb and release moisture through the seasons. As the ground beneath shifts, the asphalt above it follows—creating new low points and disrupting the original drainage design.

Heavy Vehicle Traffic and Weight

Repeated loading from heavy vehicles—delivery trucks, construction equipment, or simply high daily traffic—creates localized depressions in the pavement surface. These depressions become collection points for water after each rain. The more frequently they fill, the faster the surrounding pavement deteriorates.

Freeze-Thaw Cycles

Indiana’s winters put asphalt through a punishing freeze-thaw cycle, and the damage accumulates faster than most property owners realize. Here’s the sequence: water infiltrates small cracks during a rain event. Temperatures drop overnight and that water freezes—expanding by roughly 9% in volume—which forces the crack wider. The next day it thaws, and water seeps deeper before freezing again. Repeated cycles of this process cause cracks to widen, potholes to form, and pavement areas to settle unevenly. Much of this damage doesn’t become visible until spring, when the freeze-thaw activity relaxes and weakened sections finally give way under traffic loads.

Poor Original Installation

Some pitch problems trace back to the original installation. If the grading and sloping phase of the initial paving project was not completed correctly, the pavement will lack adequate slope from day one. Older lots, in particular, were often built with minimal slope requirements. Reliance Engineering notes that many older lots were constructed with 1% slopes or less, well below the 2–4% now considered best practice for commercial surfaces.

The Pitch Adjustment Process

Adjusting asphalt pitch is a more involved process than simple patching or resurfacing—and that’s intentional. Laying new asphalt over an existing drainage problem only mirrors the old depressions into the new surface. The fix has to address the underlying grade.

Assessment and Planning

A professional asphalt paving contractor will begin with a thorough site assessment, identifying exactly where water is pooling, where the high and low points are, and what’s causing the drainage failure. This evaluation guides the entire correction plan.

Milling and Removal

The existing asphalt in the affected area is milled (ground down) or removed entirely to expose the sub-base. This creates a clean foundation for re-grading rather than layering new material over old problems.

Grading and Sub-Base Preparation

With the surface removed, the sub-base can be re-profiled to achieve positive drainage—meaning every section of the surface is sloped to direct water toward a designated outlet. If soft spots or unstable sub-base material are found, these are undercut and replaced with compacted aggregate.

New Asphalt Installation

Once the base is properly graded and compacted, a binder course of asphalt is applied, followed by the surface course. Both layers are compacted for maximum density and durability. The result is a surface that drains efficiently and is built to handle the demands of regular traffic and seasonal weather changes.

When to Call a Professional

DIY fixes—filling low spots with sand, gravel, or patching compound—rarely solve pitch problems. These materials shift under traffic and weathering, and the standing water returns, often worse than before. A long-term solution requires correcting the slope, not just filling in the low spots.

Professional pavement contractors bring the equipment, expertise, and technical knowledge to assess drainage issues accurately and execute corrections that last. For larger commercial lots or asphalt driveways with significant settling, the scale and precision required make professional involvement essential—not just convenient.

If you’re noticing consistent pooling, new cracks near wet areas, or uneven surfaces on your Indianapolis property, it’s worth getting a professional assessment before the problem compounds.

Frequently Asked Questions

How do I know if my asphalt pitch is the cause of water pooling?

The simplest indicator is how long water stays on the surface after rainfall. If standing water lingers for several hours or persists into the following day, the slope is likely insufficient. A professional can confirm this with a site assessment.

Can I just add more asphalt on top to fill in low spots?

Resurfacing without correcting the underlying grade typically mirrors existing depressions into the new asphalt layer. The drainage problem will return. Proper pitch adjustment requires milling or removing the old surface and re-grading before new asphalt is applied.

How often should asphalt pitch be inspected?

A good practice is to inspect your pavement after heavy rain events, particularly in early spring after the freeze-thaw season. This is when winter damage becomes most visible and new drainage issues are easiest to identify.

Does asphalt pitch adjustment require a full replacement?

Not always. In cases where the drainage problem is localized, partial milling and regrading of the affected section may be sufficient. A contractor can assess the scope of the issue and recommend the most cost-effective correction.

Why is proper asphalt pitch especially important in Indiana?

Indianapolis and the broader Indiana region experience significant freeze-thaw activity each winter. Standing water left on asphalt surfaces has more opportunity to infiltrate, freeze, and cause structural damage. Proper pitch removes that water before it becomes a seasonal threat.

Keep Your Pavement Performing Year-Round

Asphalt pitch problems rarely resolve on their own. Each rainstorm pushes more water into areas it shouldn’t be, each winter freezes it a little deeper, and each spring reveals a little more damage. Catching the problem early—and correcting it properly—protects your investment and keeps your property safe.

Ready to address drainage issues on your property? Contact ACI Asphalt & Concrete in Indianapolis, Indiana to schedule an estimate today. Our team will assess your pavement, identify the root cause of any pitch or drainage problems, and deliver a solution built to last.

Call Now

Related Posts:

Asphalt Driveway Repair: What You Need to Know
Should I Be Worried About Standing Water on My Asphalt Lot?
Asphalt Driveway Cost: What to Expect?

How to Dispose of Old Concrete and Unused Concrete Mix

Leftover concrete might seem harmless sitting in your yard or garage, but getting rid of it the wrong way can lead to real consequences—environmental damage, code violations, and unexpected costs. Whether you’re a homeowner wrapping up a DIY project or a contractor managing demolition debris, knowing how to handle concrete waste properly is essential.

This guide covers everything you need to know: how to dispose of old broken concrete, what to do with unused concrete mix, when to call a professional, and which disposal method makes the most sense for your situation.

Concrete Disposal in Indiana

Why Proper Concrete Disposal Matters

Concrete is one of the most common construction materials in the world, and it’s also one of the bulkiest waste products to deal with. When it ends up in the wrong place, the problems compound quickly.

Environmental Impact

Improperly dumped concrete can leach harmful chemicals into surrounding soil and nearby water sources, damaging local ecosystems. Beyond the chemical risk, concrete takes up enormous space in landfills—space that could be spared through responsible recycling practices.

Legal and Financial Risks

Illegal dumping of construction waste is a violation in most municipalities, including Indianapolis. Fines can be steep, and the cost of remediation often exceeds what proper disposal would have run in the first place. Checking local regulations before you start is always worth the extra few minutes.

How to Dispose of Old Concrete

Old concrete—whether it’s a broken driveway slab, a demolished patio, or chunks from a foundation—has several disposal pathways depending on its condition and quantity.

Recycle It

Recycling is the most environmentally responsible option. Concrete recycling facilities crush old material into what’s called recycled concrete aggregate (RCA), which gets repurposed for a wide range of construction applications. The material stays useful and less ends up in a landfill.

RCA is used for:

  • Road base and subbase layers for driveways and parking lots
  • Aggregate in new concrete mixes for sidewalks and curbs
  • Erosion control along riverbanks and shorelines
  • French drains and stormwater management systems
  • Retaining walls, garden pathways, and hardscaping

Contact local recycling centers or waste management facilities in Indianapolis to confirm they accept concrete and whether any fees apply. Some facilities accept it free of charge because they resell the processed material.

Reuse It on Your Property

If the concrete pieces are structurally sound and uncontaminated, you don’t necessarily need to haul them away. Broken chunks can serve as a base layer beneath a new patio or driveway, fill for erosion-prone areas, or edging material in garden beds. It’s a practical way to reduce waste without any hauling costs.

Hire a Professional Removal Contractor

For large volumes, heavy slabs, or concrete with embedded rebar, professional concrete removal is often the safest and most efficient route. Rubble removal contractors bring the equipment needed to break up, load, and transport the material. Many will take it directly to a recycling facility rather than a landfill, which is better for the environment and sometimes less expensive than you’d expect.

Landfill Drop-Off

As a last resort, concrete can be dropped off at a licensed construction and demolition (C&D) landfill. Fees typically range from $35 to $100 or more per ton, depending on the facility and your location. This option is generally less sustainable than concrete recycling, but it’s a legitimate path when other options aren’t available.

How to Dispose of Unused Concrete Mix

Unused concrete mix—either dry bags that have hardened in storage or freshly mixed concrete left over after a pour—requires a different approach.

Let It Harden Before Disposing

Never pour unused liquid concrete down a drain or into a storm sewer. Wet concrete is highly alkaline and can damage pipes, contaminate groundwater, and create serious environmental problems. Instead, allow the remaining mix to harden completely in a contained area, such as a cardboard box, a plastic bucket, or a simple form made from scrap wood.

Once fully cured—typically 24 to 48 hours for small quantities—hardened concrete can be handled the same way as any other concrete debris: recycled, reused, or taken to a disposal facility.

Pour Small Amounts Into Useful Shapes

If you have a small amount of mixed concrete left over, consider pouring it into a useful form. Stepping stones, garden edging blocks, or simple filler pieces can be made from leftover mix. It takes minimal effort and eliminates the disposal problem entirely.

Store Dry Mix Properly for Future Use

Unopened or partially used bags of dry concrete mix can be stored for future projects—provided they haven’t been exposed to moisture. Keep bags sealed in a dry, covered area. Once a bag has absorbed moisture and begun to harden, it’s no longer workable and will need to be disposed of as hardened concrete.

Call a Professional for Large Quantities

If you’re dealing with a large volume of unused mix from a commercial pour or a ready-mix truck, don’t try to manage it on your own. Concrete suppliers and removal professionals have systems in place for handling excess material responsibly. Contact them promptly—wet concrete has a limited working window before it sets permanently.

DIY Disposal vs. Hiring a Professional

Smaller concrete jobs—a single bag of unused mix, a few broken stepping stones—are typically manageable as a DIY disposal project. Load the hardened pieces into a truck or trailer and take them to a local recycling center or C&D facility. The cost is usually just the drop-off fee.

Larger projects tell a different story. Breaking up and loading heavy concrete slabs without the right equipment is physically demanding and potentially dangerous. Renting a jackhammer and a dumpster adds up fast, and if you’re not familiar with local disposal requirements, you could end up paying twice for a redo.

For most homeowners and contractors dealing with significant concrete waste, hiring a professional is the more cost-effective and time-efficient choice when all factors are considered.

Frequently Asked Questions

What can recycled concrete be used for?

Recycled concrete aggregate is used in road construction, drainage systems, landscaping, erosion control, and as a base material for new driveways and foundations. It’s a durable, cost-effective alternative to virgin aggregate materials.

Are there fees for concrete disposal?

Yes, in most cases. Landfill drop-offs for construction debris typically cost between $35 and $100 or more per ton. Some recycling facilities accept concrete for free or at a reduced rate because they process and resell the material. Always call ahead to confirm pricing and policies.

How long does concrete take to harden before it can be disposed of?

Small amounts of mixed concrete typically harden enough to handle within 24 to 48 hours. Larger pours may take longer to fully cure. Once the concrete is solid throughout, it can be broken up and disposed of through standard concrete disposal channels.

Can I donate leftover concrete or concrete materials?

In some cases, yes. Habitat for Humanity ReStore locations and local community groups occasionally accept usable construction materials. Hardened concrete chunks with a clear reuse application—like garden stones or fill material—can sometimes be offered through community platforms like Craigslist or Facebook Marketplace.

The Right Disposal Choice Protects Your Property and the Environment

Old concrete and unused mix don’t have to become a headache. With the right approach—recycling when possible, hardening mix before disposal, and calling in professionals for larger jobs—you can clear your site cleanly and responsibly.

If you’re working on a concrete or asphalt project in Indianapolis and need expert help from start to finish, ACI Asphalt & Concrete has you covered. From pavement repair to full installations, our team handles every step of the job with the experience and equipment it takes to do it right. Request a bid today.

Call Now

Related Posts:

Sidewalk Replacement Cost: Your Average Price Guide
Should You Replace Moldy Concrete Pavement?
Top 10 Mistakes to Avoid with Ready-Mix Concrete